How to Make a Worm Bin
What you Need:
- Rubermaid Bin
- Shredded Cardboard/Paper(or other bedding)
- Food Scraps
- Drill
- Worms
- Spray bottle
Rubermaid Bin:
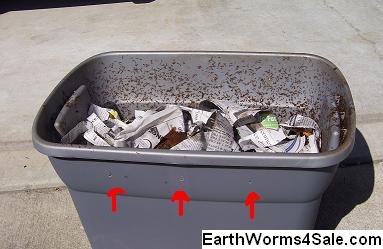
Step 1) Drill 1/8" holes around the sides and on the lid. 10 holes on the sides and 10 on the lid will be enough. This provides ventalation for the worms.
2) Drill Approx. 5 1/8" holes in the bottom of the bin for drainage.
3) Rip up cardboard and paper and put it into the bin. The smaller the pieces the better. Fill bin about half-way full.
4) Moisten the Cardboard and Paper with your spray bottle. It should be thouroughly moist but not dripping wet.
5) Add a layer of food scraps. See the Raising Worms page to see what type of foods are good and which are bad.
6) Add another thin layer of dry paper and cardboard. A dry layer near the top will help prevent the worms from trying to escape your bin.
7) It is a good idea to let the bin sit for a few days before adding the worms. This allows the food scraps to start to decompose so the worms can eat it. Also try initially adding a handful of dirt. This offers 'grit' for the worms as well as helpful bacteria.

Eventually your bin will start to look like above. I circled a cocoon if you were wondering what they looked like. Good luck and don't forget, you can contact us about any worm questions you may have.
